- Home
- Alanna Taylor-Tobin
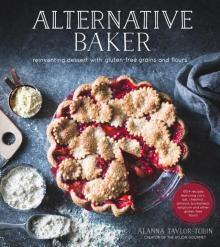
Alternative Baker
Alternative Baker Read online
ALTERNATIVE BAKER
reinventing dessert with gluten-free grains and flours
WRITTEN AND PHOTOGRAPHED BY
ALANNA TAYLOR-TOBIN
CREATOR OF THE BOJON GOURMET
Begin Reading
Table of Contents
About the Author
Copyright Page
Thank you for buying this
Page Street Publishing Co. ebook.
To receive special offers, bonus content,
and info on new releases and other great reads,
sign up for our newsletters.
Or visit us online at
us.macmillan.com/newslettersignup
The author and publisher have provided this e-book to you for your personal use only. You may not make this e-book publicly available in any way. Copyright infringement is against the law. If you believe the copy of this e-book you are reading infringes on the author’s copyright, please notify the publisher at: http://us.macmillanusa.com/piracy.
TO MY GRANDMOTHERS,
ANNE AND BUBBA, FOR ALWAYS
SHARING THE BEST COOKIES
INTRODUCTION
At a birthday party the other day, my sweetie Jay and I were offered a chocolate cupcake from a local bakery. I had been testing recipes for this book for seven months and we were up to our ears in unconscionable amounts of baked goods that all boasted alternative grains and seasonal fruits and vegetables. Not wishing to be rude, Jay took a bite, and frowned. “It’s bland,” he whispered. I tasted the cupcake, expecting something super sweet and flat, and was pleasantly surprised. The cake was well seasoned, not too sweet and quite chocolaty, with enough salt to counter the sugar. The frosting was creamy and smooth, the cake rich and moist. What was missing? Before we left for the party, I’d baked a batch of the Buckwheat Pear Galettes with Walnuts and Salty Caramel and Jay and I had shared one, still warm from the oven. The charcoal-hued crust shattered against tender pears coated in a nap of salty caramel, warm buckwheat exuding notes of chocolate and spice, earth and toasted nuts. It was then that I realized: our palates had become accustomed to alternative grains.
Baking with alternative grains opened up a whole new feast of flavors, textures and colors that I never knew existed. Culinary pioneers Kim Boyce and Alice Medrich have shown us that these flours aren’t just desirable for their nutritional value, but also for the aesthetic pleasures—touch, taste and smell—that they bring to the kitchen. It’s been a delight to see the look on friends’ faces when they bite into a Chestnut Roulade Cake with Rum, Mascarpone and Roasted Pears or Buckwheat Bergamot Double Chocolate Cookie for the first time; their eyes widen, corners of the lips turn upward and a look of pure surprise crosses their faces. “What is this new flavor I’m tasting?” they ask.
Buckwheat flour sings of toasted hazelnuts mingling with cocoa and cinnamon. Teff flour tastes of malted milk and chocolate, mesquite flour of baked earth and chestnut flour is wildly sweet and rich. Sorghum and millet are nutty and grassy; amaranth is potently vegetal and almost herbaceous. Coconut flour is sweet with notes of the tropics, and almond flour has a delicate nuttiness. Replace the all-purpose flour in gingersnaps with sweet rice and mesquite flours, add teff flour to cobbler biscuits or whip up some scones made with oat and amaranth flours—all of a sudden what was once rather ordinary when made with everyday white flour becomes extraordinary.
In my kitchen, flavor comes first, but there are other benefits to playing with alternative grains and flours, too. Each has its own fragrance, color, history and nutritional profile. I always look forward to opening a jar of teff flour, whose malty smell takes me back to kindergarten and glasses of malted chocolate milk at recess. The lactic, whole-grain scent of oat flour reminds me of baking cookies on a rainy day. When I pull out my bag of mesquite flour with its reddish tan hue and scent of baked earth, I’m instantly transported to the red, rocky deserts of Arizona and New Mexico, where I traveled as a teen. The sunny yellow of corn flour never fails to cheer me, and I could gaze at buckwheat flour, with its heathered gray hue and charcoal flecks, for hours. It’s a sensory experience.
Once I’d grown to love these flours and developed my own associations with them, researching their histories was even more fascinating. For example, protein-rich amaranth is strongly linked to the Aztec empire, where it accounted for 80 percent of diets, was used in religious rites and when popped and mixed with honey, embodied statues of the Aztec gods. Mesquite flour, on the other hand, nourished desert-dwellers native to North America, and has the unique ability to slow the metabolization of food and stabilize blood sugar levels. Teff, the world’s tiniest grain, hails from the isolated Ethiopian highlands and is the only grain to contain significant levels of vitamin C. And chestnut flour, now considered the upper echelon of alternative flours with a price tag to match, was pooh-poohed as peasant food for centuries.
My journey to alternative grains and flours began nearly fifteen years ago. My sister had been diagnosed with a gluten allergy before most people even knew what the stuff was. Wondering whether the gluey wheat protein might account for my own lifelong digestive troubles, I began experimenting with alternatives. There’s an inherent learning curve to baking with gluten-free (GF) flours (see my first disastrous GF cookie experience here), but balancing them with sticky ingredients—sweet white rice flour, tapioca, ground chia seeds and eggs, to name a few—allows their good qualities to shine. Most of my recipes now come together with a minimum of fuss, and with tastes and textures that surpass their refined wheat counterparts, piquing the palate of the most sensitive celiac to the most ardent wheat-eater.
So it is with this new palette of flavors, textures and histories that we make new of what was once old. I’m delighted to share this collection of recipes based on alternative grains and flours and punctuated by all manner of delicious ingredients, from peak-of-season fruit to sweeteners to chocolate and spirits.
So let’s get baking. Let’s reinvent dessert.
HOW TO USE THIS BOOK
Some of these recipes can seem intimidating at first, particularly if you are new to baking, to alternative flours or to working with seasonal ingredients. Here are some suggestions on how to approach these recipes without hating life. (Read more about alternative grains and flours on here and here.)
FLOUR CHILD
If you’re just beginning to dabble in GF baking (or baking at all) and are looking to stock your pantry with a few alternative grains, start with recipes that use just two or three flours.
These flours are easy to find and even easier to love with their mild flavors and multipurpose uses:
• Almond flour
• Millet flour
• GF oat flour and old-fashioned rolled oats
• Polenta/corn grits, cornmeal and corn flour
• Sweet white rice flour (a.k.a. glutinous rice flour; NOT regular white rice flour)
Try these easy-peasy recipes:
• Tart Cherry, Chocolate and Hempseed No-Bake Oat Bars
• Blueberry Corn Flour Muffins
• Creamy Baked Grits with Sweet Corn and Berries
• Millet Skillet Cornbread with Cherries and Honey
• Vanilla Butter Cake with Whipped Mascarpone and Summer Berries
• Fig and Olive Oil Cake
• Peach Brown Butter Crème Fraîche Tart
• Chocolate Cranberry Pecan Tart
• Blueberry Plum Cobbler with Corn Flour Biscuits
• Blackberry Crisp Frozen Yogurt
• Apricot Clafoutis with Honey and Cardamom
• Pear and Pomegranate Clafoutis with Vanilla, Saffron and Pistachios
• Meyer Lemon Bars with Vanilla-Almond Crust
• Summer Stone Fruit a
nd Marzipan Crumble
FLOUR POWER
If you have some experience with gluten-free, alternative flour baking and wish to expand your repertoire, try these slightly less common flours:
• Teff flour
• Buckwheat flour
• Coconut flour
• Sorghum flour
And the sometimes fussier recipes that use them:
• Boozy Chocolate Cherry Teff Pots
• Apple, Buckwheat and Gruyère Puff Pancake
• Huckleberry Buckwheat Cheese Blintzes
• Buckwheat Bergamot Double Chocolate Cookies
• Poppy Seed, Pluot and Buckwheat Streusel Muffins
• Rustic Plum, Teff and Hazelnut Tart
• Roasted Banana Teff with Muscovado Sugar Glaze
• Maple Bourbon Peach Cobbler with Cinnamon Teff Biscuits
• Blackberry Buckwheat Crisps
• Buckwheat Hazelnut Pear Financiers
• Chocolate Zucchini Cake with Matcha Cream Cheese Frosting
• Sorghum Peach Oven Pancake
• Cashew Lime Blondies
GRAINIAC
If you’re an adventurous baker who wants ALL the flours, look for:
• Mesquite flour
• Chestnut flour
• Amaranth flour
And try these recipes:
• Apple Chestnut Tart with Salty Caramel
• Cherry Chestnut Chocolate Chip Cookies
• Salty Caramel Banana Cream Tart with Mesquite Crust
• Strawberry Rhubarb Cobbler with Ginger-Amaranth Biscuits
• Mesquite Gingersnaps and Chewy Double-Ginger Molasses Cookies (and the recipes that use them)
• Chestnut Fig Scones
• Chestnut Plum Financiers
• Cinnamon Amaranth Peach Scones
• Any of the pie or pandowdy recipes; the dough takes some getting used to but produces stunning results
HOW TO WIN AT BAKING
I’ve heard it said that there are two types of people in the world: cooks and bakers. Cooks are hot-tempered creative types who break all the rules and don’t follow directions. A little of this, a bit of that, they can throw together a genius meal using the dregs of your crisper drawer and a skillet. Recipes are tiresome words meant to be skimmed rather than analyzed. Then there are meticulous, exacting bakers. With their obsessive attention to detail and love of structure, they will follow a recipe to the letter.
My advice to you when making these recipes is to be a bit of a cook and a baker. Yes, these recipes have been carefully formulated to work with these exact measurements, ingredients, temperatures, baking pans, etc. So be like a baker and measure accurately, and make the recipe as written, at least the first time around. That said, each kitchen has its own set of variables—weather, oven temperature, baking pan size and material, brands of ingredients used and measuring techniques all have their own bizarre effects on baking. So be like a cook, too: use your senses and intuition to determine if that cake needs a longer baking time than called for, or if your scone dough needs more liquid. If something seems done to you before the timer goes off, pull it out; if it seems underdone, leave it in longer.
Along these lines, here are some general baking tips that should help you be a better baker (and cook).
1. Read, read, read. Before you get started, read through a recipe from start to finish; this will give you a sense of timing and flow before you begin, and there will be no nasty surprises, like chilling times, ingredients or equipment. I always give the recipe a final read-through once my batter is mixed, checking off ingredients in my head to make sure I haven’t left any out. Once you place the goodies in the oven, refresh your memory about what to look for in terms of doneness and bake time. And make sure you pay attention to ingredients. For example, sweet white rice flour is quite different from regular rice flour and the two are not interchangeable. (Read more in “Alternative Grains and Flours”.)
2. Mise en place. I never do this because I have a tiny kitchen and all my baking supplies are already in one place, but many bakers I know like to gather and measure all their ingredients before getting started. This way, you won’t accidentally leave anything out.
3. Know how to measure. Ingredients in this book are given in volume (cups, tablespoons, teaspoons) as well as metric measurements (grams, which are weight, and milliliters, which are volume). To measure by volume, use dry measuring cups for flours, sugars and the like (those little metal cups with handles that come in ¼-cup increments) and use wet measuring cups for liquids (usually glass or plastic pitchers that come in 1- and 2-cup sizes). Weight measurements will give you the most accurate results, particularly for alternative flours that can have wide variations in weight due to the coarseness of the grind, moisture content and clumpiness. If measuring by volume, see step 4.
4. Dip and sweep. When measuring dry ingredients such as flours, grab your bag or jar of flour, a dry measuring cup and a straight knife or (my favorite) a small, offset spatula. If the flour has been sitting for a while, such as a new bag from the grocery store, stick your cup in the bag and fluff it up a bit. Conversely, if your flour is fluffy (say you just bought it in bulk, or you just poured your bag into a storage jar), rap the container on the counter a few times to settle it back down. Now, dip your measuring cup into the container and lift it up so that it’s mounded with flour. Give it the gentlest of taps on the rim of the jar or with your hand to settle any large air pockets. Use your knife or offset spatula to sweep away the excess flour to make a level cup, letting the excess fall back into the jar or bag. Do the same thing when measuring with teaspoons or tablespoons.
5. Use the utensils and mixing techniques called for. When called for, whip, beat, stir, fold or rub in. Beating whipped egg whites into a batter with a spoon will give different results than gently folding them in with a spatula.
6. Use the pan size called for. An inch (2.5 cm) may not seem like a big difference, but a 9-inch (23-cm) round pan has 25 percent more volume than an 8-inch (20-cm) round pan, and this will have a big effect on the shape of your cake and its baking time. Similarly, the material of your baking vessel may transfer heat differently. Glass, ceramic, steel, aluminum and cast iron will give slightly different outcomes, making it essential to channel your inner cook and use visual cues and your instincts to determine doneness.
7. Oven placement matters. Take care to arrange your oven racks as specified in the recipe. For instance, scones burn easily on their bottoms, so baking them toward the top of the oven is essential. Pie, on the other hand, tends to get soggy on the bottom; baking it on the lower rack helps keep the bottom crisp.
8. Oven temperature—it’s anyone’s guess! Most ovens don’t run true to temperature, no matter how fancy and new. My oven is about as ancient as some of the grains in this book, so I am at the mercy of my external oven thermometers, of which I always have two. But these can be inaccurate, too. The best way to see that your oven runs at the proper temperature is to hire a professional to come calibrate it. The second way is to make like a cook and adjust your oven according to your instincts. Are things not browning when they should? Maybe your oven runs cold and you need to turn it up. Are your cookies incinerated? Your oven probably runs a little warm and you should dial down the temperature a bit. Opening the oven door frequently will lower the temperature, too, so try to keep the peeking to a minimum.
9. Use a timer. And also, don’t use a timer. Bake times are approximate and will differ depending on myriad factors, including oven temperature, pan material, the temperature of your kitchen and ingredients, how you measured your ingredients and how frequently you open the oven to check for doneness. So use your eyes, nose and fingers or a toothpick (when applicable) to determine if something is fully baked, regardless of the times given. That said, do set a timer for a little before the earliest done time so you know when to start checking on things.
10. Keep your cool. Freshly baked goods are still cooking fr
om residual heat even after you’ve removed them from the oven, so it’s best to obey the recipe and let things cool or chill for the specified time. Before storing baked goods, let them cool completely so they don’t steam themselves.
DESSERT FOR BREAKFAST
“When you wake up in the morning, Pooh,” said Piglet at last, “what’s the first thing you say to yourself?”
“What’s for breakfast?” said Pooh. “What do you say, Piglet?”
“I say, I wonder what’s going to happen exciting today?” said Piglet.
Pooh nodded thoughtfully. “It’s the same thing,” he said.
—A. A. Milne
Breakfast is my favorite meal of the day because it’s the one where you’re allowed to eat dessert. Muffins are essentially cake in individual form. Oven pancakes resembling clafoutis puff around gently sweetened fruit. Scones are doused with honey, and glazed biscuits wrap around berries. In the case of chocolate-topped oat bars, you can even eat cookies for breakfast and none will be the wiser. There’s a reason why bitter beverages like coffee and black tea star at breakfast—they’re the perfect thing to wash down these sweet breakfast treats.
Alternative grains have the power to create breakfast snacks and pastries that taste good in addition to being good for you. I’ve kept most of the recipes in this section on the less-sweet side, using alternative grains and flours to add nutritional value and a bit of staying power to some favorite breakfast treats that are worth getting out of bed for any day of the week.
Sorghum adds sweet nuttiness to a custardy oven pancake encasing honey-roasted peaches. Melt-in-your-mouth cream scones get their tender texture from millet and oat flours, as well as amaranth and chestnut flours in the variations. Teff flour makes wildly flavorful roasted banana scones slathered in a butterscotchy glaze. Buckwheat stars in buttery poppy seed muffins as well as blintzes filled with sweet cheese and huckleberries. Don’t miss the pumpkin cranberry loaf, which is barely sweet and made from a host of nuts, seeds and oats. With unique tastes and textures, these breakfast treats are sure to add a bit of excitement to your day, too.
 Alternative Baker